Disclaimer
At the time of writing this I am a novice with Houdini there are mistakes in my workflow and methodology. Lots of things could be compressed, simplified or done in a better way.
This process starts with an inflow object that the simulation will later source for adding particles. For this render I chose to use a torus object and animate the radius of the tube as an inflow. The tube grows and shrinks timed with the velocity pumps.
(This is not the best way to do this. This method creates velocity pumps that can point inwards into the model and relies on two randomized variables to function. At the time of writing this I do not know how to change the length attribute of each line. Possibly by looping over each line and changing the length?)
This method attempts to somewhat automate the process, but for more art direction and control, an artist could animate these lines by hand for an exact result.
After the velocity curves are made, they are converted to volumes and imported into the dop network (pump_vel_source). The pump activation and scale are animated with the scale of the source tours to give an overflowing effect.
(This simulation has the scale operation set to add were it would have probably been better to use multiply)
This simulation does not use reseeding in the flip solver, as it does give good connected velocity pumps, but due to the low viscosity of the simulation, the liquid expands too much. This example uses the process described in this video2 by Dave Stewart with an Surface Oversampling of 10.
DOPNet Overview

This simulation uses a modified version of Karl Richter’s hole filling method described here3 and here4, and a modified technique (and big thank you to for the tutorials) of What I Found’s video5 for utilizing the hole filler.

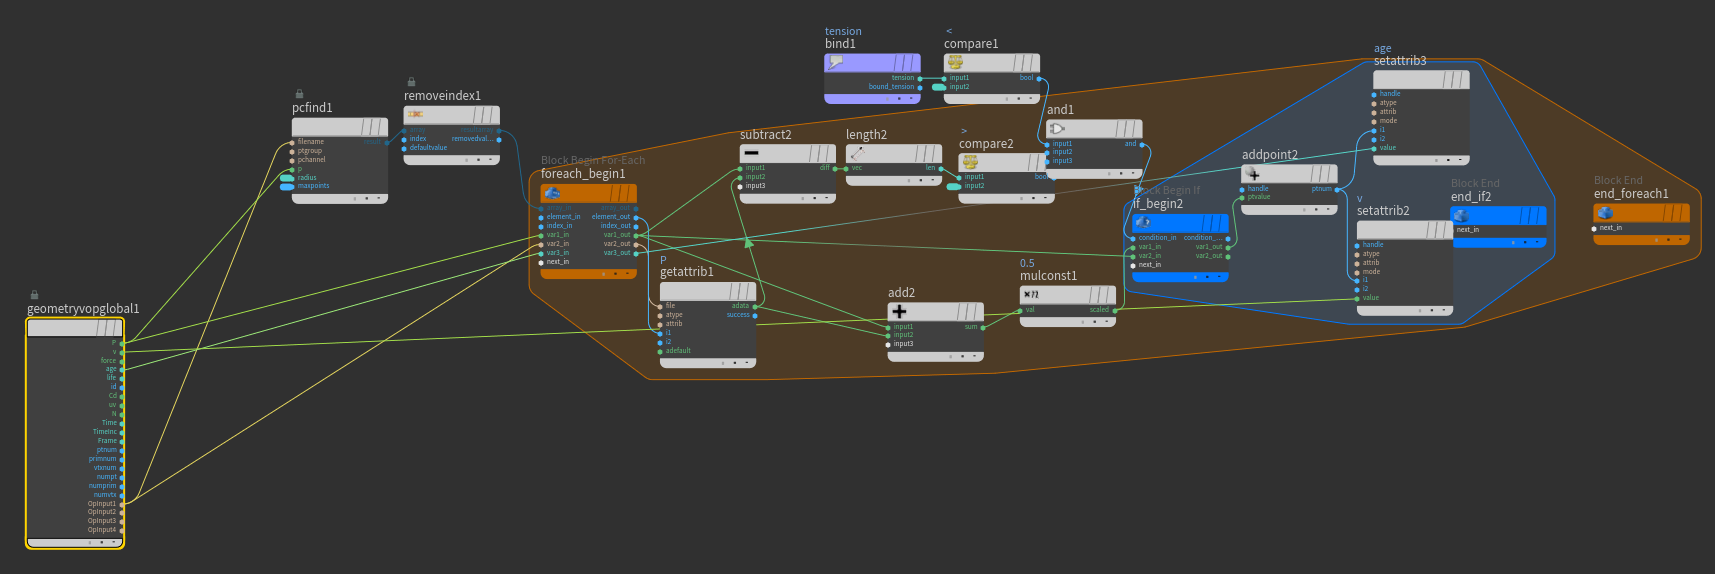
The first step of this method checks the speed of every point and applies an attribute if they are over a certain threshold.

The attribute wrangle then adds value to a group called velmag (there’s certainly a better way to do these two steps).If a point is moving from being controlled by a velocity pump, it will be added to the velmag group. If a point has collided with an object and/or its velocity is below the set threshold, it will be ignored.
The points in the velmag group are then fed into Karl Richter’s hole filling popvop. This gives the effect of fast moving strings that are connected, but don’t continue to spread out after colliding.

The only change made to this popvop is the addition of copying the age attribute of the surrounding points to the newly created points. This age will be used by the next popvop.

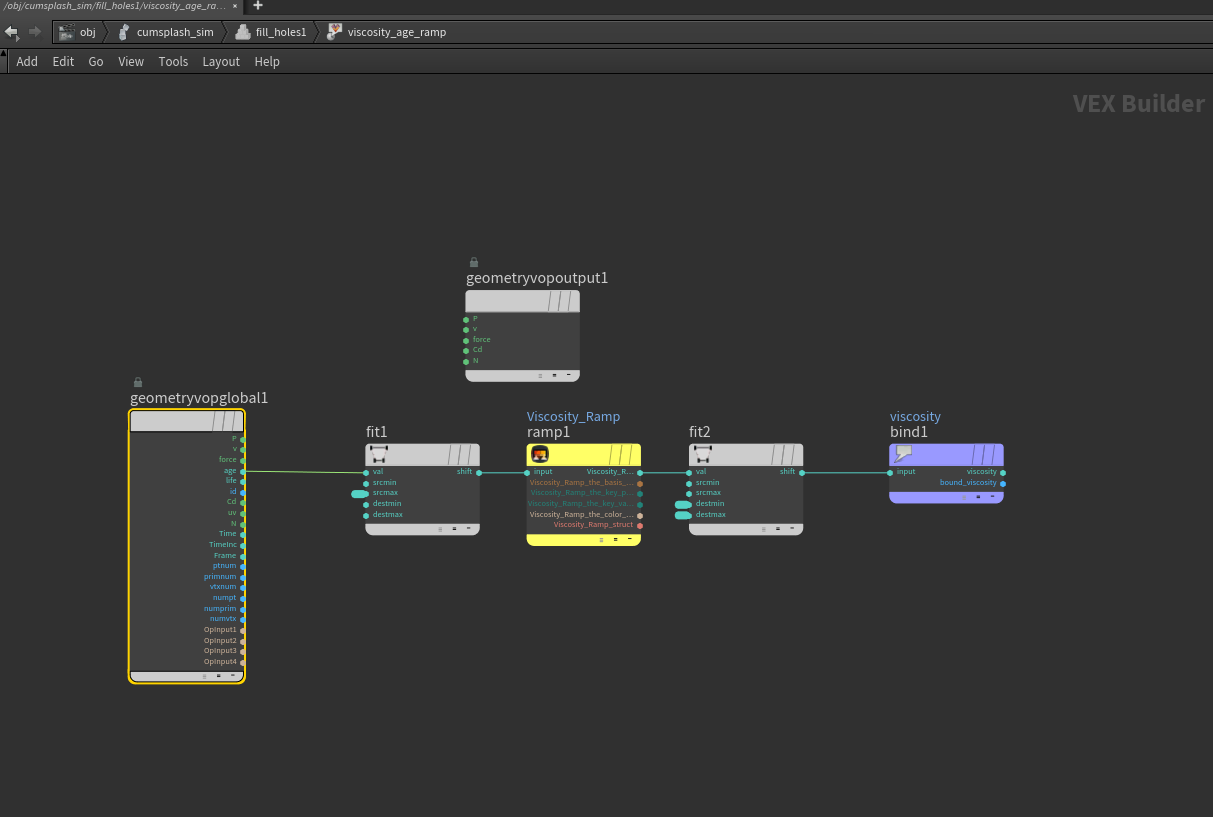
The next popvop is a modified version of the process described in this video6 by 홍가네Cinema4D. This popvop looks at the age of every particle and adds a viscosity attribute to it based off the configurable graph.


(Unfortunately the controls are buried insides of the fill_holes popvop and at this time I do not know how to promote them to the top of the Sop Solver or how to reference an external gradient ramp.)
From here the simulation is a basic FLIP solve. Only changes of note would be to change the Velocity Transfer from FLIP to APIC.
There are some drawbacks with this simulation though. The particle distance, velocity scale, viscosity, and settings for the fill hole are not connected. Meaning that to increase the particle distance, all the other settings must be tweaked in as well. More R&D is needed to further define a working solution.
This simulation uses a particle distance of .03. This means simulating is fast and efficient, but the overall shape is large and blobby, thin strings would not be possible with this setup without fine tweaking.
Additionally, the hole filling method will work continuously as long as a point has velocity. This can cause problems if any particles get on the ceiling which will create and infinite fountain as some stick to the surface while new particles are birthed and moved by gravity. A fix for this may be adding an age control to the velmag group, so points after a certain age are removed from the group.
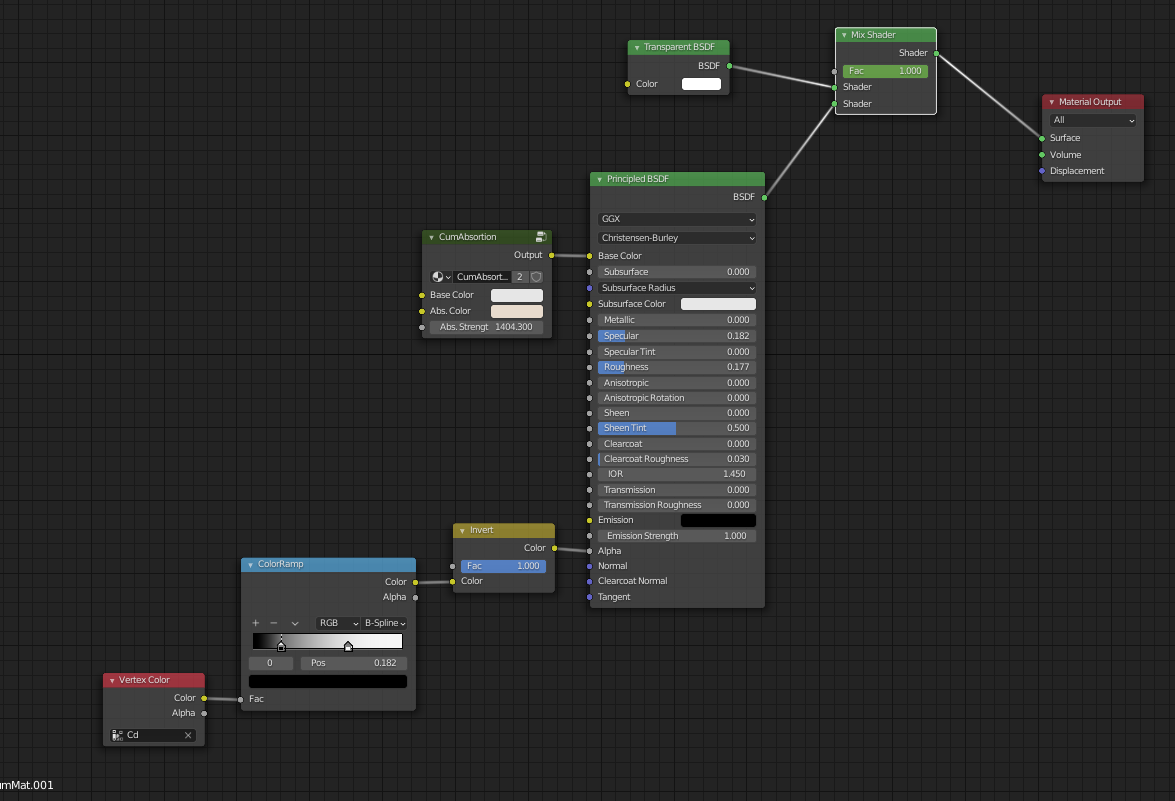
After meshing the particles, this method7 by Jeff Wagner is used to calculate the thickness of each point of the mesh. This data can be applied as vertex color and used as an opacity mask in rendering.
After exporting the mesh I used the shader I previously made here8, and used the thickness map to control the opacity.

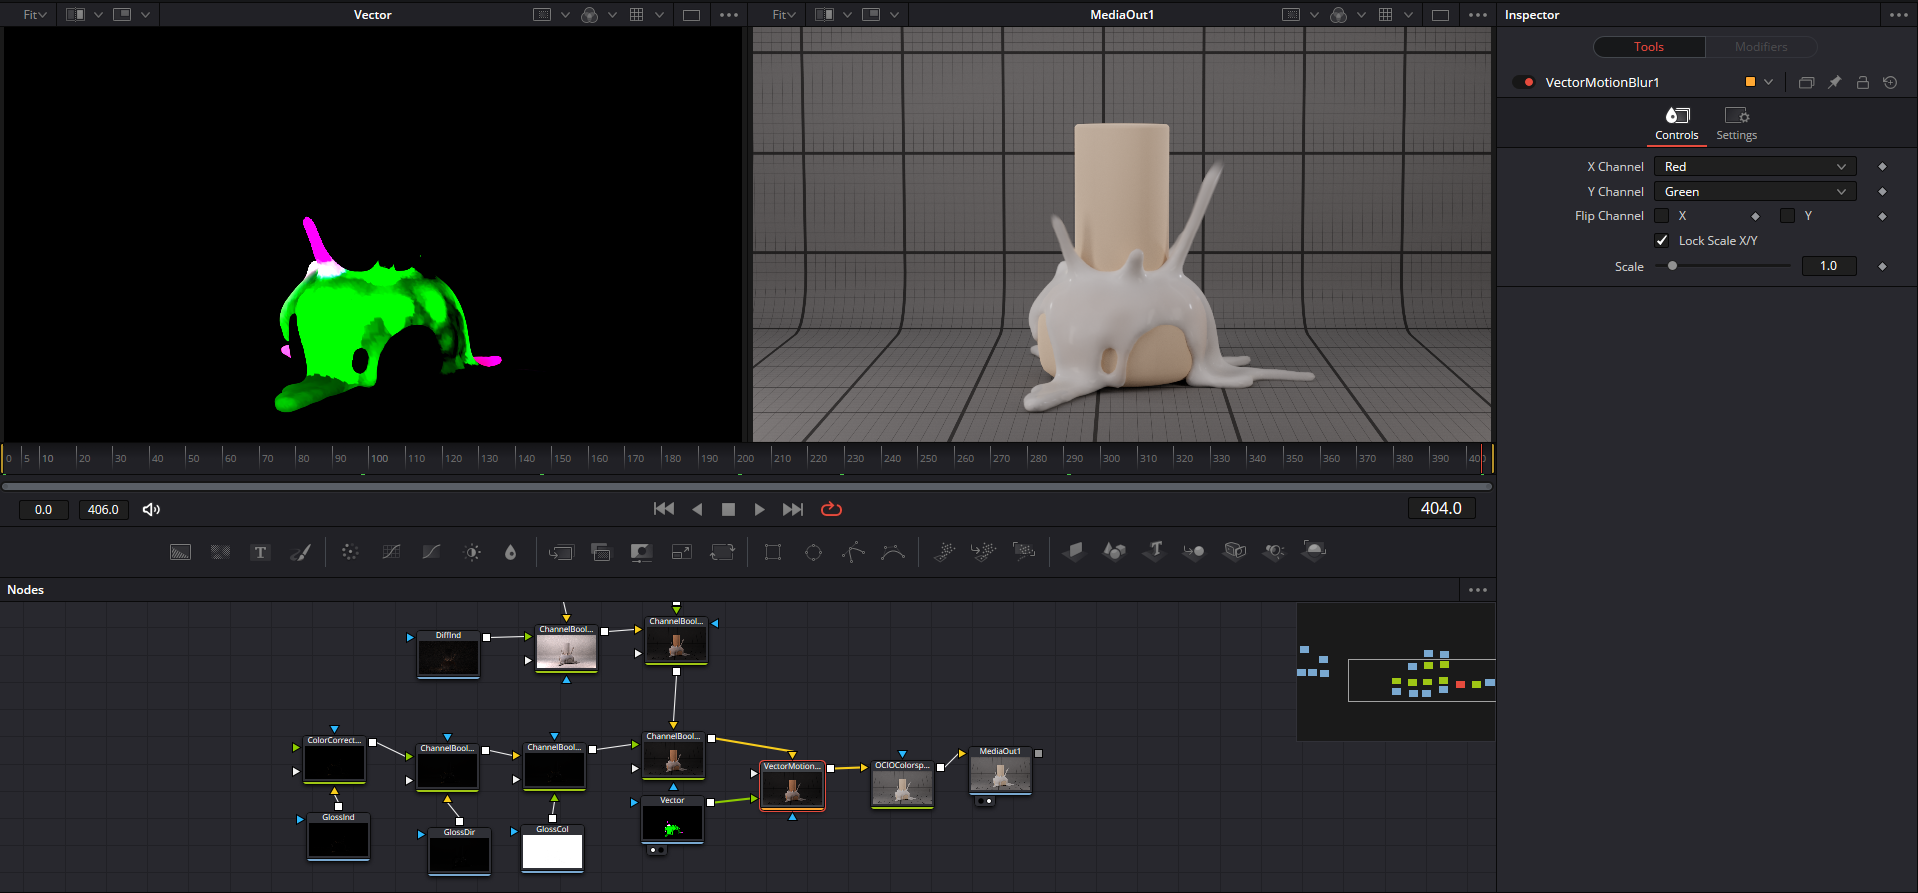
After rendering the animation, the EXR's were sent for final comp in Davinic. When compositing in Davinci, make sure to change the X Channel and Y Channel to Red and Green.

For composting Blender renders in Resolve, Branden Arc shares a useful workflow in this video9, and Louis du Mont demonstrates how to use custom ocio transforms for blender in this video10.
Post Mortem
Much more R&D needs to be done with the simulation method and material/rendering methods.
Need to test different values with lower particle distances to fix issue of simulation breaking or crashing at higher resolutions.
As for rendering, the thickness map worked well for changes in opacity but could go further. Either adding noise in blender or Houdini to break the solid shapes up more. Also, tweaking the material to be more on the transparent side, as when you focus on it the transparency is visible, but when you're not looking for it or on mobile it is more difficult to see. The thin strands at the end look a bit plastic like at some points, adding randomness or noise to the texture might fix this. Maybe even mesh an interior to help break the shape up more?
Finally, make sure the mesh isn't clipping into the ground when rendering.
Thank you for reading, hope this can be useful for someone. Send me a dm on twitter if you have any questions : )
Sources
1. “Houdini Paint Splash Tutorial”, YouTube, uploaded by What I Found, 13 June 2020, https://youtu.be/aSmNuuprvi8.
2. “Houdini FLIP Quick Tip - Abusing Reseeding for better small-scale viscous sim meshing”, Vimeo, uploaded by Dave Stewart, 9 August 2017, https://vimeo.com/228926167.
3. “splashTest”, Vimeo, uploaded by Karl Richter, 26 January 2016, https://vimeo.com/153145442.
4. “FLIP smorganic/sheeter effect?”, ODFORCE, posted by Karl Richter, 26 January 2016, https://forums.odforce.net/topic/18111-flip-smorganicsheeter-effect/?do=findComment&comment=145601.
5. “Houdini Retime FLIP Sim custom Reseeding -- Long Version”, YouTube, What I Found, 18 June 2020, https://youtu.be/KNXHqEN11zE.
6. “Cream Simulation 크림 시뮬레이션 - viscosity [Houdini tutorial]”, Youtube, uploaded by 홍가네Cinema4D, 7 October 2020, https://youtu.be/LrUXgY3bZeo.
7. “Measure Geometry Thickness”, SideFX Forums, posted by Jeff Wagner, 11 December 2014, https://www.sidefx.com/forum/topic/35462/?page=1#post-165834.
8. “Old Cum Material”, Zaytha Temp Site, posted by Zaytha, http://zaytha.com/CumSimv1.
9. “Blender Render Passes In Davinci Resolve & Fusion (EXR Compositing)”, Youtube, uploaded by Branden Arc, 23 October 2020, https://youtu.be/pLt1230dtYE.
10. “Blender Filmic in DaVinci Resolve 16”, YouTube, uploaded by Louis du Mont, 11 April 2019, https://youtu.be/nJYVIKjYkO8.